Search This Blog

Showing posts with label Crafts. Show all posts

Monday, July 14, 2014

What fun! What fun! E is one!


This year flew by.  I mean at Mach 3 speed.  I can't believe E's First Birthday has come and gone.  I'm a little ashamed to admit it but I started planning his party as early as December!  (I have issues, I know!)

The party was Dr. Seuss themed.  I ordered decorations from Birthday Express - they sell great Dr. Seuss party sets, with plates, cups, cutlery and table clothes.  They also sell adorable window decals and wall cut outs

E's Dr. Seuss collection is quite respectable and made for easy décor.  I placed several of his books around the living room.


I couldn't find a banner that I liked, so I used the basic Paint application on the computer and created a banner saying Happy Birthday, spelled out on Cat in the Hat hats, sewn together with bias tape.  I made a similar banner for E's highchair saying "I am 1".


Food-wise, I kept it simple.  I made:
fruit salad - called "Beezle Nut Fruit Salad";
  • potato salad - lamely called "Tangy Pangy Potato Salad";
  • green eggs;
  • ham (and turkey) sandwiches;
  • "cat"prese skewers;
  • doughnuts - because "D is for doughnuts";
  • cheese trees; and
  • Birthday Cake with Jerry Jordan's Jelly!


For the cake, I tried to style it like the birthday cake from "Happy Birthday to You"!  The cake itself was a plain white cake, with raspberry jam filling and lemon frosting:


Lemon Frosting

1 box lemon pudding
1/4 cup icing sugar
1 cup milk
1/2 tub thawed cool whip

Mix pudding, icing sugar and milk with electric mixer for 2 minutes at medium or high speed.  Allow mixture to sit for 1 minute.  Fold in cool whip until frosting is consistently mixed. 


I also ordered custom "green egg" cookies from a local baker.  They were AMAZING!!!  Cake Expectations totally exceeded my expectations.


All-in-all, it was a good day!

Thursday, July 10, 2014

Two posts in a month...what?!?!?

I might as well try to stick with the blogging again for a little while, especially since I have so much on the go right now.  With E's First Birthday approaching, I went through the mounds of onesies and sleepers he has grown out of over the course of a year.  It is mindboggling (a) how quickly he has grown and (b) just how much stuff a baby can have.

Both my husband and I are a little sentimental about some of the onesies.  Rather than donate them or hand them down, I selected between 50 and 60 of our favourites and made a quilt.  Admittedly, not my finest quilt job (there is definitely a reason I prefer the "rustic" nature of rag quilts to traditional quilts), but it means a lot to us and it is something that we can hang on to for years to come, without starting down the dangerous path towards hoarding.

Friday, October 11, 2013

Painted Pumpkins - Fall Edition

Oh I have so many posts to get around to.  I have been baking up a storm during my maternity leave and have tried a variety of recipes I found on (or as a result of) Pinterest.  But I will start with the painted pumpkins I did for the front porch.  I wanted something quick and simple to distract from the hideous excuse for my garden, which I have not attended to this year for rather obvious reasons.  Previously, I have made more than a dozen painted pumpkins for Hallowe'en.  This year, I decided to paint a few for fall decor.

I wasn't sure how much crafting or baking I would get done during maternity leave.  Honestly, I find it easier to bake or cook because it naturally fits into most days.  However, painted pumpkins take very little time and with the baby wrap I was able to have little E with me for most of it (being very careful not to get paint on him, of course).  (Apparently he was camera shy here.)


I wanted rough lines for a more rustic look.  I only used tape on one of the smaller pumpkins but otherwise this was all free-hand.  I used gold and dark red for a nice autumn feel.  Here is a shot of the pumpkins after they were dry.


Here are a couple shots out on the front porch.  The floral arrangement is something I threw together last year with faux flowers from the dollar store and Michaels.


I should probably also show a close up of our current centrepiece on the kitchen table.  I switched it up for fall and used two types of dry beans to fill three square/angular vases of differing heights and finished it off with candles and a little bit of twine on the two smaller vases.


My next post will be the first to get on the with business of updating on the baking (chocolate cake, apple cake, pear cake, pumpkin pie, pudding cookies) and cooking (Philly Chicken Cheese Sandwiches, Chicken Pot Pie) that I have been doing lately.

Wednesday, August 21, 2013

First post since my world changed - follow up and new pictures

Wow, the last two months have flown by.  Towards the end of my pregnancy, I was busy finishing up with work and often too tired to bake or craft.  Then I went into labour a week early in early July and since then, for obvious reasons, I have been a little on the busy side with our lil' one.  Our son took his time (22 hour labour) but arrived on July 12th and has changed our world.

A while back I posted regarding the wall art I created with our baby's name but couldn't post the whole project because our family did not know the gender of our baby.  Now that its no longer a secret, I can post a picture of the finished project - albeit, not hung up on the wall yet.


I have also been taking a few pictures.  I am by no means a photographer, but these were done by laying a white towel down in his crib.  I did a few different looks but this was my original idea since he is such a "catch".  <insert groan here>


I have a bit more time most days, so hopefully I will have a few new projects or baked goods to post about in the near future.

Thursday, May 23, 2013

Been a while - but I have been crafting (Spring Wreaths)

It has been quite a while since I have posted anything.  Its not that I haven't been crafting or baking (though definitely not as much as usual), its more that I'm swamped with tying up everything at work before mat leave and also being exhausted at the end of each day.  However, I did a couple spring wreaths recently and thought I would share some pictures.

These are the same style of wreath I usually make - faux flowers, ribbon and grapevine wreaths.  Oh, and the glue gun, can't forget that. 

 
I needed a pop of spring colour and definitely got that - one is bright yellow and white, the other is shades of purple and yellow.  Walmart's selection of flowers included some sprigs with silk butterflies that were quite cute, so I incorporated those into both wreaths.

Anyhow, here are a few pictures of the final products.


Monday, April 29, 2013

Nursery Update - Name/Initials Wall Art


I've made some wall art with the baby's name/initials for above the crib.

For this wall art, I purchased 8 by 8 (inch that is) canvases.

I taped each one using Frogtape (which we had left over from painting the nursery) to create stripes.  The stripes are about an inch or so each.

I painted the open spaces with a really great shade of blue/green from Americana - Bahama Blue.  On the canvas it looks very close to the Tiffany's teal.  Do as many coats as necessary to get the coverage you want.

I removed the tape before the paint is fully dry.  But for one small spot, the tape did its job beautifully.


For the name/initials, I found really great wooden letters in the craft section of a local Walmart.  I didn't want anything too big, so they are about 3-4 inches in height.  I painted these with Mink Pearl, a metallic shade from Americana.

Once the canvas and letters were dry, I attached them with a little wood glue and hot glue on the backs of each letter.

This was a relatively cheap project and works great for short names or initials (especially if the name is long-ish).

I'm just showing the first initial (both potential names start with "E" - Elizabeth and Euan).  Once we can put the entire piece up, I will post additional pictures.

Monday, April 15, 2013

Nursery Update - Animal Wall Art DIY


Last month, I posted about the animal shape wall art I made for the nursery.  At the time, I hadn't decided how I was going to hang the pictures on the nursery wall.

In the end, I decided to attach a simple piece of ribbon on the back of each picture frame.  I also decided to use 3M wall hooks.  I did this because I figure if I want to move the pictures around (especially if I ever change the theme inside the frames), the 3M wall hooks are great because they don't leave marks and are easy to reapply.

Here's a few pictures of the wall art arranged above the change table:


The giraffe is definitely my favourite. 

Wednesday, March 6, 2013

Animal Shape - Mix and Match Wall Art


I saw a lovely idea for silhouettes done with mismatched prints at Project Nursery (here).

I absolutely fell in love with this and decided I had to do something similar for the nursery.  I wanted to do animal prints and again, the prints had to be neutral - nothing overtly boy or girl.

I decided to use an alligator, giraffe, lion, monkey and elephant.  Our bedding will likely carry this animal/jungle theme throughout (especially the giraffe and monkey - I have a thing for those animals in particular).

I picked out what I think is a nice mix between vibrant and soft prints (that wouldn't clash with the wall colours), traced the animals, cut out the shapes and the appropriate sizes for the background prints, glued the animals to the background and put them into their frames.


I think the giraffe is my favourite.  


Voila - done!  Well, sort of.  I still have to attach ribbon to the back to create hooks to hang the frames from but that can wait until the room is painted.

Monday, March 4, 2013

Left over paint chips? Make wall art!

After making the mobile for the nursery, I had a tonne of left over paint chips (okay, slight exaggeration).  Still inspired, I used two sizes of punches (1/2 inch and 3/4 inch) and punched between 8-12 of each shade.

From there, I just bought a white matted frame and used the paper that comes with the frame (with the prototypical happy family/couple/child pose).  I flipped that over, and started gluing the punched paint chips into a pattern.  As it developed, I realized that it was starting to look like the sky and the ground, so I added a few lighter pieces in the centre to make it look like a rain shower.

Certainly not Dali or Picasso, but I think it turned out well.


Friday, December 14, 2012

Christmas Crafting - Framed monogram

A little while ago, I tried making a monogram using rolls of book pages.  You can see the prior post here.

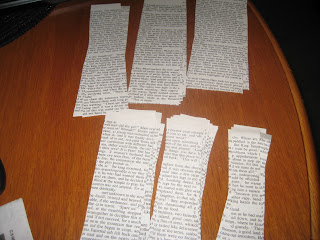
I loved this idea and now that I've tried it, I've thought of several ways to adapt this idea for gifts.  For my sister-in-law, as a Christmas gift, rather than making the monogram on a cutout letter, I bought a simple frame with a 1/4 inch plywood insert.I painted the insert red, and from there I cut out the necessary book page strips, rolled (using glue) 50 strips.


It's important that you have various lengths if you want to create the letter with tapering.  I used paper glue again, it seems to work well with both the rolls of paper and the wood.


As a final accent, I made two small felt flowers and attached those using a glue gun.


As an aside, I think this idea would be lovely if adapted for the first initial of a new baby's name, with suitable colours used.  For the book pages, you could use a children's book (at the very least, to be sure that no inappropriate words are visible).