Search This Blog

Showing posts with label parties. Show all posts

Monday, July 14, 2014

What fun! What fun! E is one!


This year flew by.  I mean at Mach 3 speed.  I can't believe E's First Birthday has come and gone.  I'm a little ashamed to admit it but I started planning his party as early as December!  (I have issues, I know!)

The party was Dr. Seuss themed.  I ordered decorations from Birthday Express - they sell great Dr. Seuss party sets, with plates, cups, cutlery and table clothes.  They also sell adorable window decals and wall cut outs

E's Dr. Seuss collection is quite respectable and made for easy décor.  I placed several of his books around the living room.


I couldn't find a banner that I liked, so I used the basic Paint application on the computer and created a banner saying Happy Birthday, spelled out on Cat in the Hat hats, sewn together with bias tape.  I made a similar banner for E's highchair saying "I am 1".


Food-wise, I kept it simple.  I made:
fruit salad - called "Beezle Nut Fruit Salad";
  • potato salad - lamely called "Tangy Pangy Potato Salad";
  • green eggs;
  • ham (and turkey) sandwiches;
  • "cat"prese skewers;
  • doughnuts - because "D is for doughnuts";
  • cheese trees; and
  • Birthday Cake with Jerry Jordan's Jelly!


For the cake, I tried to style it like the birthday cake from "Happy Birthday to You"!  The cake itself was a plain white cake, with raspberry jam filling and lemon frosting:


Lemon Frosting

1 box lemon pudding
1/4 cup icing sugar
1 cup milk
1/2 tub thawed cool whip

Mix pudding, icing sugar and milk with electric mixer for 2 minutes at medium or high speed.  Allow mixture to sit for 1 minute.  Fold in cool whip until frosting is consistently mixed. 


I also ordered custom "green egg" cookies from a local baker.  They were AMAZING!!!  Cake Expectations totally exceeded my expectations.


All-in-all, it was a good day!

Tuesday, November 6, 2012

Homemade Cheese Crackers

A few weeks ago, I came across a recipe for homemade cheese crackers on Pinterest.  It seemed too easy to be true, but I was intrigued and decided a friend's birthday party would be a good reason to try them out.

In short: AMAZING!!!  So easy!  So tasty!  And did I mention, easy.

Here's what you need:

8 oz grated Old Cheddar (approximately half of a 500 gram block)
4 tablespoons of butter (chilled, not softened)
1 cup flour
3/4 teaspoon salt
2 tablespoons cold water

Pulse the cheese, butter, flour and salt in a food processor until the mixture looks like "coarse sand".

Pulse in the water one tablespoon at a time.  The dough should look like very small pebbles.

Wrap the dough in plastic and chill for at least 20 minutes.

When you pull the dough out of the fridge, roll out a 1/4 inch thick sheet and cut out crackers in your desired shape and size (the original recipe brilliantly used goldfish shaped cutters made out of a pop can - but, as my husband often reminds me that I'm clumsy with sharp objects, I refrained from trying this technique).  Repeat until you have cut out as many crackers as your dough allows.

Place on baking sheets that are lined with wax paper.  Bake in an over that is heated to 350 F. for 15-18 minutes (or longer depending on how crispy you want them).

I've taken these to work and to a party and have already been asked for the recipe multiple times.  They really are worth trying.  Thank you Pinterest!!!

I was also decorating a cake at the same time that I made these, so I didn't take pictures of the entire process, but here are a couple pictures.


Saturday, November 3, 2012

The things a girl does for her bestfriend

So, my bestfriend was throwing a party for her boyfriend's 40th birthday party.  For the party, she wanted to surprise him with a special cake.  What did she have in mind...a boob cake.  Fun idea, right?  Only problem, she doesn't bake.  But I do, so problem solved.

After a trip to an adult store to purchase the cake pan, the night before the party, she came over to help me bake the cake (the word "help" is relative - but we had a blast).  The boob cake pan wasn't very deep, so we also decided to place it on a smallish sheet cake.  I purposely overfilled the shape pan, as I would prefer to carve a flat surface rather than deal with the cake not rising evenly.


I decided to do a marble cake and I used Betty Crocker's Devil's Food and Vanilla mixes.  For the icing, I used two cans of Betty Crocker's Whipped Vanilla icing and one can of regular Vanilla (for the filling between the "layers" and for the crumb coat).


To make the skin tone, we used Wilton's Copper with a little Golden Yellow colouring.  For, er, anatomical correctness, we made a little bit of icing with Wilton's regular Pink for the nipples (I can't believe I just wrote that).  As always, I used gel colouring rather than liquid.


Surprisingly, I will say that it came out nicely and it got a great reaction at the party.


Saturday, October 27, 2012

When a torte goes awry

Earlier this year, I came across a great recipe for a brownie torte.  The original recipe that the torte is based on is a Betty Crocker recipe.  It can be adapted for brownies made from scratch or your preferred box mix.  When I'm in a rush, I use Duncan Hines' new Decadent Triple Chocolate Brownie mix.  If making a recipe from scratch, I suggest that you also add chocolate chips or chunks for texture.

The steps are pretty easy:

1. Using whatever brownie mix you prefer, bake a 9 x 13 pan of brownies according to the recipe directions.

2. Cut the sheet of brownies into three equal sheets of brownies.

3. Place one layer on the cake sheet/serving tray.  Using homemade or store bought icing, microwave the icing for 20 seconds and stir.  Apply just under 1/3 of the icing to the first layer of brownie.

4. Repeat by adding the second layer of brownie and 1/3 of the icing.

5. Finish by adding the third layer of brownie and apply the remaining icing.  Smooth the icing over the whole torte and allow the icing to set and solidify.

I have made this for a few parties and every time the reaction is amazing.

Last night my Dad held his annual hallowe'en party.  I decided to make the torte again.  Because I didn't have a lot of time after work, admittedly I rushed the process a little bit and tried to start layering the torte before the brownies had cooled enough.  The top layer cracked apart into four pieces when I was placing it on top of the torte.  Since it was for a hallowe'en party, I decided to work with it, and made a decrepit tombstone dedicated to B. Rownie.

I also made a few Oreo cookie balls.  So easy!!!  Using a package of Oreo, create crumbs using the food processor.  I used half a package of cookies, to which I added half a package of cream cheese and mixed this.  Create bite sized balls and freeze them for at least 1/2 hour.  Melt four chocolate squares (I used semi-sweet but dark chocolate also works really well), with 1 teaspoon of butter.  Take the balls out of the freezer and use forks to roll the balls and coat them in the chocolate.  Place the balls back in the freezer for 1/2 hour.  For the party I finished them off with white icing piped "RIPs", and placed them on green icing intended to look like grass and moss.

The final product was much cuter than I thought it was going to be when the brownie first went awry (but definitely not my finest work):

Once again the reaction was overwhelming, the torte is to die for.  (Insert groan here.)

Wednesday, October 24, 2012

My fascination with fascinators

I'm too busy to load and post pictures of more recent crafting that I've done (plus I'm not too pleased with the outcome of a project that I will post about in the next week or so).  So, I figured it was time to reveal that one of my vices is fascinators.  I have always loved fascinators and ornate hair pieces.  I don't know if its my UK heritage coming through but I personally think that a fascinator is a mandatory accessory at any event for which you must dress up.  However, I can't bring myself to pay some of the prices out there for nice pieces. 

At some point last year, I decided that I had the crafting ability to make my own (flight of fancy, delusional thinking or naive exuberance - take your pick).  Somehow that resulted in me making more than 20 different fascinators (yes, I still have to find room for them all), including several for friends. 

I took a tonne of pictures (not all of them are very good, its time for a new camera) and figured I should post some here. Here are a few pictures of some of my favourite fascinators I made in 2011 and I'll post more when I have an occasion to make another piece:

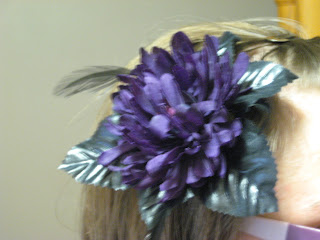
 The first is a small clip I wear to work occasionally.

 I love the combination of purple and black.


I quite liked this design and made it in several colours and materials.  The red and black is my favourite and really stands out.


These last two are smaller and great for everyday wear.

These are just a small selection and I'll try to add more pictures in the future.

Sunday, September 16, 2012

Boston Bruins Birthday Baking Bonaza

I couldn't help myself with the alliterative title.  Sorry for the nerd moment, but it was just begging to be done. 

Any ways, this weekend was my godson's birthday party.  His birthday's not until the end of the month, but if you have ever tried to rent a sheet of ice during hockey season (not the NHL type, since apparently that won't be happening), you will know that you take what you can get.

My godson is a huge hockey fan and a rather talented goalie in his own right.  For his 10th birthday, his mom (my bff) and I rented a sheet of ice for the boys (young and old), and planned a hockey themed party.  My godson's favourite NHL team is the Boston Bruins (despite living just outside of Toronto, he steadfastly refuses to cheer for the "Maple Laughs" as he calls them, but a big factor is that his uncle plays for Boston).

I offered to bake for the party and gave my godson a choice of the cake design he wanted.  He could pick either (a) a goalie pad designed sheet cake; (b) a hockey net, stick and puck; or (c) a round cake with a Boston Bruins design.  He picked the Bruins design (somewhat to my chagrin, since my piping skills need some work). 

Since I had so much fun making the Tye-Dyed Cupcakes a few weeks ago, I decided to make the Bruins logo cake and also cupcakes with swirl icing using the Boston Bruins' black and gold colours for icing.

As usual, when I'm making decorative cakes and cupcakes, I stuck to boxed mixes for simplicity and used Betty Crocker mixes (Devil's Food Cake and Chocolate Fudge) and frosting (Vanilla and Milk Chocolate) and Wilton food colouring and decorating tools.  Here's the pictures of the works in progress:

Boston Bruin Swirl Cupcakes:


 Boston Bruin Logo Cake:


Packed up and ready to go to the party:

Here are some pictures of the NHL themed decorations - honestly, its amazing what's available these days for planning partys.  Party City is a very dangerous store to be in for extended periods of time.


Here's the cake and cupcakes at the party.  I guess, based on the last picture, the cake went over well and maybe the sugar gave the boys some extra energy for when they went skating afterwards.  All in all, while the cake is not as clean as I would like, it was fun to make and it was a fun day overall (plus, I didn't fall on the ice!!!!).