Search This Blog

Monday, May 27, 2013

Apple Chimichangas


Who doesn't like chimichangas?  Heck, who doesn't like saying "chimichanga"?

I was craving something apple-y for dessert last weekend and I have seen the link for apple chimichangas on Pinterest a billion times (the recipe is from Juanita's Cocina).  So, I figured I would give it a try.

The recipe calls for homemade apple filling, but I didn't have fresh apples, so I used a can of apple filling and chopped the apple pieces down to small bites.

I had a package of small tortillas and granulated sugar and cinnamon.  Also had vegetable oil.  All set...wait, the recipe calls for frying, which I haven't done in years.  This could get interesting.

I filled 8 tortillas and wrapped them burrito style.  I premixed 1/2 cup of sugar and 1 Tbsp of cinnamon and set it aside, all the while letting about 1/2 inch of oil heat up in the pan.

Then came the test - would I or would I not cause a grease fire and burn the house down?  I figured I had a 50/50 shot.

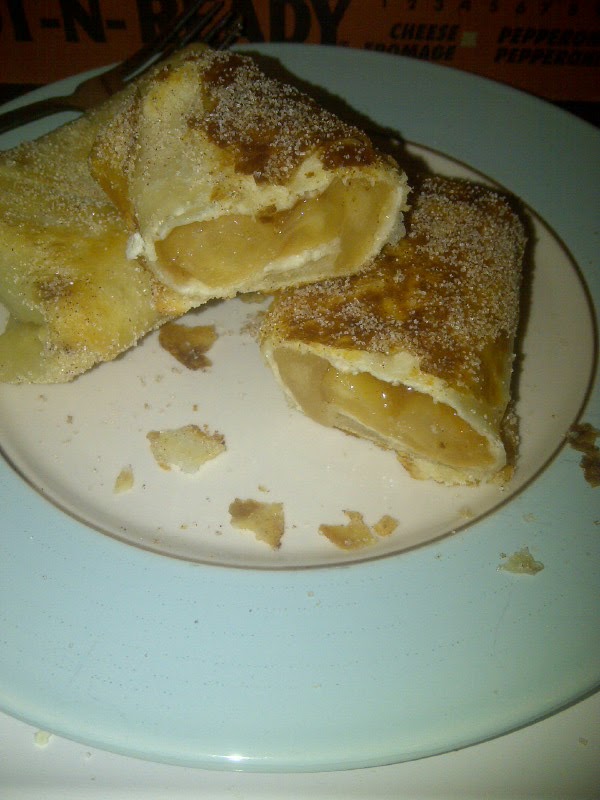
I clearly added the first three chimichangas too early and they took a while to get that lovely golden colour to them.  The next three chimichangas, well, they died a noble death since apparently I left them in too long and burnt the heck out of them.  The last three, I did for about 20-25 seconds a side, and that seemed just about right.

When the chimichangas were done frying, let them sit on a plate with paper towel to remove excess oil (and blotted them down with the paper towel a bit).  Then I rolled them in the sugar mixture and BAM, done.

I served mine drizzled with a little caramel and some whipped cream.  My husband however liked them straight up and lamented that I only made five (more specifically, lamented that I killed the other three of them).


I didn't start a grease fire, so I'm thinking that's a bonus!

Thursday, May 23, 2013

Been a while - but I have been crafting (Spring Wreaths)

It has been quite a while since I have posted anything.  Its not that I haven't been crafting or baking (though definitely not as much as usual), its more that I'm swamped with tying up everything at work before mat leave and also being exhausted at the end of each day.  However, I did a couple spring wreaths recently and thought I would share some pictures.

These are the same style of wreath I usually make - faux flowers, ribbon and grapevine wreaths.  Oh, and the glue gun, can't forget that. 

 
I needed a pop of spring colour and definitely got that - one is bright yellow and white, the other is shades of purple and yellow.  Walmart's selection of flowers included some sprigs with silk butterflies that were quite cute, so I incorporated those into both wreaths.

Anyhow, here are a few pictures of the final products.


Monday, April 29, 2013

Nursery Update - Name/Initials Wall Art


I've made some wall art with the baby's name/initials for above the crib.

For this wall art, I purchased 8 by 8 (inch that is) canvases.

I taped each one using Frogtape (which we had left over from painting the nursery) to create stripes.  The stripes are about an inch or so each.

I painted the open spaces with a really great shade of blue/green from Americana - Bahama Blue.  On the canvas it looks very close to the Tiffany's teal.  Do as many coats as necessary to get the coverage you want.

I removed the tape before the paint is fully dry.  But for one small spot, the tape did its job beautifully.


For the name/initials, I found really great wooden letters in the craft section of a local Walmart.  I didn't want anything too big, so they are about 3-4 inches in height.  I painted these with Mink Pearl, a metallic shade from Americana.

Once the canvas and letters were dry, I attached them with a little wood glue and hot glue on the backs of each letter.

This was a relatively cheap project and works great for short names or initials (especially if the name is long-ish).

I'm just showing the first initial (both potential names start with "E" - Elizabeth and Euan).  Once we can put the entire piece up, I will post additional pictures.

Tuesday, April 16, 2013

Mini Cinnamon Rolls (No Yeast)


I wanted cinnamon rolls this past weekend but didn't feel like going to the store.  More specifically, I didn't feel like getting changed out of my PJs on a Saturday morning.  Instead, I went through my recipes and found a recipe for yeast-free cinnamon rolls (again trying to avoid leaving the house).  How thrilled was I when I realized I had all of the necessary ingredients...as thrilled as a pregnant woman about to have sweets.

Ingredients:

Dough:
2 1/2 cups flour (sifted)
1/4 cup granulated sugar
1 1/2 teaspoons baking powder
1/2 teaspoon baking soda
1/2 teaspoon salt

3/4 cup 2% milk
1/4 cup half and half
4 tablespoons unsalted butter, melted (I recommend using sticks of butter, as they generally have measuring lines to assist with cutting out the necessary amount of tablespoons - I find this easier when dealing with smaller quantities.)


Filling:
3/4 cup packed brown sugar
1/2 cup granulated sugar
1 1/2 tablespoons cinnamon
1/2 teaspoon ground cloves
1/2 teaspoon salt
2 tablespoons unsalted butter, melted

Icing:
2 oz cream cheese, softened (almost melted)
3 tablespoons 2% milk
3/4 cup icing sugar

Extra:
Couple of  tablespoons of flour for rolling dough
1 tablespoon unsalted butter, melted (optional)

Preheat the oven to 425 degrees.
Grease 13 by 9 inch pan (thoroughly).

To make the dough, mix all of the dry ingredients in a large bowl.  In a separate bowl, pour melted butter into combination of milk and half and half and whisk quickly.  Pour into well in centre of dry ingredients.


Stir just until combined and then make into a ball.  You can roll out in one piece but it is more manageable to cut the ball of dough into at least two pieces and roll out separately.


Next, to make the filling, combine the sugars, spices and salt.  Pour in melted butter and combine until all ingredients are moist and crumbly.


Roll out the dough into two rectangles.  Pour even amounts of filling onto each piece of dough and press in.  Roll each piece along the long side of the rectangle.  Cut into 8-10 pieces, depending on desired thickness.


Before placing in the oven, if you want you can drizzle or brush melted butter over the top of the rolls.

Arrange in 13 by 9 inch pan and bake for 16 minutes.


To make the icing, mix cream cheese and milk until smooth.  Add half of the icing sugar and combine until smooth.  Repeat with remaining icing sugar.

When rolls are removed from the oven, drizzle icing over top.


These are not supposed to be light and fluffy, they are closer to the type of mini rolls that you might buy from the grocery store.  They are great for a couple bites of intense sweetness and spice!


Monday, April 15, 2013

Nursery Update - Animal Wall Art DIY


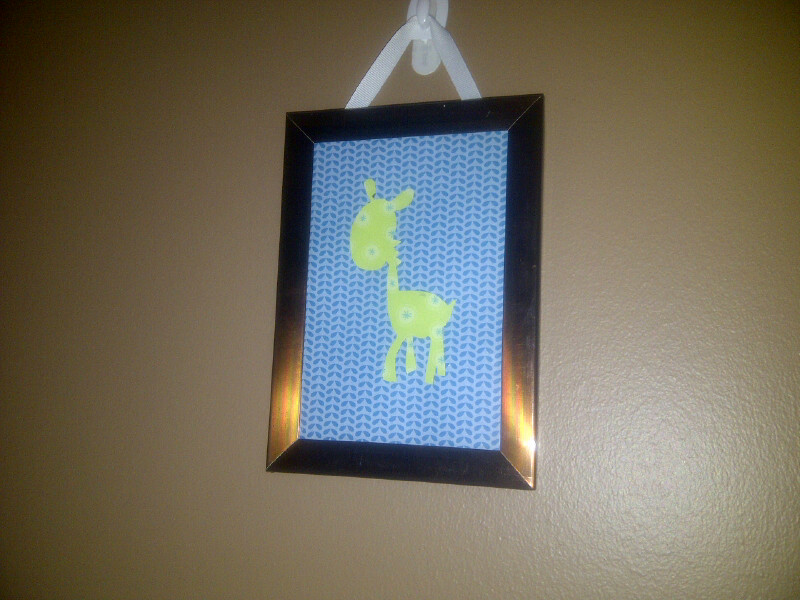
Last month, I posted about the animal shape wall art I made for the nursery.  At the time, I hadn't decided how I was going to hang the pictures on the nursery wall.

In the end, I decided to attach a simple piece of ribbon on the back of each picture frame.  I also decided to use 3M wall hooks.  I did this because I figure if I want to move the pictures around (especially if I ever change the theme inside the frames), the 3M wall hooks are great because they don't leave marks and are easy to reapply.

Here's a few pictures of the wall art arranged above the change table:


The giraffe is definitely my favourite. 

Monday, April 8, 2013

Easter Sugar Cookies


I haven't been posting much lately because I'm usually too tired to do anything other than work.  But I did make some sugar cookies for Easter.  I used the same recipes as I did for St. Patty's Day, so rather than provide the whole recipe, here are some pictures.


Baked Pickles - First Attempt


No, it wasn't a pregnancy craving, but yes, I was in the mood for fried pickles recently.  I don't deep fry anything, so I looked for baked recipes that would make do.

This recipe from Shrinking Kitchen seemed quite good.

Ingredients
pickles, 1 jar (I used kosher dill pickles)
egg, 1
dill (I used dried dill)
panko crumbs, 1 cup (to which I added italian seasoning)

I followed Shrinking Kitchen's steps pretty closely except where noted.
  1. Preheat oven to 400 degrees.
  2. In a food processor, combine panko crumbs and dill until well-mixed. Pour bread crumbs onto a plate. (I didn't use my food processor, next time I will try this.)
  3. Break the egg into a bowl and beat.
  4. Remove a pickle and pat with paper towel to remove some sodium. DON'T SKIP THIS STEP. (I concur!!!)
  5. Dip in egg and then coat in bread crumbs.
  6. Place coated pickle on foil-lined cookie sheet.
  7. Repeat.
  8. Bake at 400 degrees for 15 minutes, flip, and bake for 5 more minutes. Broil for 1 minute until they brown, watching carefully.
  9. Eat.


They tasted good, but I was disappointed by the coverage.  I will try using the food processor next time to see if that makes a difference.  But the key being, I will try them again.