Search This Blog

Sunday, September 1, 2013

Baby sewing projects - Car Seat Cover

 
Hubby is very protective of anyone trying to touch Little E, even more so than I am.  Whenever we have gone out, we tend to keep a muslin blanket draped over the car seat.  However, it was light and whenever there was a breeze, it would be havoc.  We started using office clips to hold it on, but it was a sorry solution.
(Said office clip)

I kept seeing car seat cover instructions every time I looked for sewing projects and initially I didn't think they were necessary.  Now I know better.  One of the best sites for instructions is here - I particularly like her reference to the cover being a "greeter deterrent".  Exactly what I was going for.

I bought a couple meters of broadcloth and printed cotton and strips of velcro.  I followed the instructions linked above.  The trickiest part is getting the straps placed onto the cover.  You can either mark your material or attach the straps to the car seat handle where you want them and then pin them, loosely, to the cover.  I did the latter.


I did not iron the material before making the cover, but obviously that's a good idea (the cover has a pretty well defined crease in it, but that can be fixed).


I'm happy with the results and the Hubby was happy to have a greeter deterrent.  All in all, it was pretty quick to make, especially since Little E actually cooperated and decided to nap (you will note that he is not swaddled, since he has decided that swaddling is for sissies this week).


Friday, August 30, 2013

Baby sewing projects - Headbands


We are starting to get into a bit of a routine that works for us as Little E is 7 weeks old.  As a result, I have been able to work in some time to sew some simple projects.  Over the next few days I will post the results of a few recent projects, including in process photos where I remembered to take them.  Where applicable, I will also post links to great websites where I got the instructions from.

If you have seen other entries on the blog, it is clear that my baby is a boy.  However, my best friend was also pregnant this year and had a beautiful little girl.  On Pinterest I saw a link to instructions for very simple jersey headbands for babies.  Included in the instructions is a chart providing the approximate lengths of material that work for different ages, up to and including adult - and yes, I made a couple basic headbands for myself.

I bought a few pieces of solid t-shirt jersey material in light blue, navy blue and purple.  One of the benefits of using jersey is that you don't have to be perfect, since the material naturally rolls up so you don't have to hem the edges.

I followed the instructions in the link above, so I won't bore you by repeating them and there are really good pictures included.  Below are a few in process pictures. I did not however glue the rosettes on to the headband, rather I sewed them on.


The one on the right has a felt rosette.


Tuesday, August 27, 2013

A monthly celebration

Thanks to some ideas on Pinterest, I've decided to take monthly pictures of Little E for each month of his first year.

Each month I am making a large card that indicates which month it is and taking both a solo shot and a picture of our family.  I'm just using some of the card stock that I keep on hand and writing in the date as well.

Here is the first solo from one month.


I will post updates as the months fly by (sadly its true how fast time goes by with a lil' one).

Saturday, August 24, 2013

S'mores Brownies


I expected to have to learn to multitask to epic proportions when our son was born and that I wouldn't have time for much else in the early days but didn't truly realize what that meant until he was here.  Yesterday, he was six weeks old yesterday and it was the first time I baked since before his birth. 

Speaking of baby...I can't help myself but I have to post this picture.  Out for a walk and the breeze caught the muslin sheet covering his stroller and this is the result.  I'm totally biased but I think it is too cute for words.


Now, back to the baking.  Little E and his dad went to Grandpa and Grandma's while I attended a baby shower for my BFF (whose baby girl was born early at 31 weeks and is going to come home this weekend!!!). So I wanted to make some sweets to take over for my in-laws.  I decided to make s'mores brownies because it felt very "summery" and around here that's a nice change as this is becoming known as the summer that wasn't. (That said, the cool weather was very much appreciated when I was still pregnant.)

Recipe

1 cup graham cracker crumbs
1/4 cup unsalted butter (melted)
1/4 cup sugar
1/4 tsp salt (If you use salted butter, do not add salt)

Brownie mix or your favourite brownie recipe

2 cups small marshmallows

1 square semi-sweet chocolate
1 tsp unsalted butter

Instructions

1. Mix graham cracker crumbs, butter, sugar and salt.  Press into bottom of greased 8x8" or 9x9" pan.  Bake for 15 minutes at 325F.

2. Make brownies according to box or recipe, as applicable.  Pour over crumb base and bake brownies according to directions on box or recipe.

3. As soon as brownies are done (a toothpick comes out clean), cover with small marshmallows.  Change oven settings to broil.  Insert pan and broil for 1-2 minutes until marshmallows are puffy and golden brown.  Watch carefully as the marshmallows burn easily (think of campfire marshmallows!). 


4. Melt chocolate and butter together in microwave for 45 seconds and stir until smooth.  Top marshmallows with chocolate.


5. Cut while still warm.  Enjoy!


Wednesday, August 21, 2013

First post since my world changed - follow up and new pictures

Wow, the last two months have flown by.  Towards the end of my pregnancy, I was busy finishing up with work and often too tired to bake or craft.  Then I went into labour a week early in early July and since then, for obvious reasons, I have been a little on the busy side with our lil' one.  Our son took his time (22 hour labour) but arrived on July 12th and has changed our world.

A while back I posted regarding the wall art I created with our baby's name but couldn't post the whole project because our family did not know the gender of our baby.  Now that its no longer a secret, I can post a picture of the finished project - albeit, not hung up on the wall yet.


I have also been taking a few pictures.  I am by no means a photographer, but these were done by laying a white towel down in his crib.  I did a few different looks but this was my original idea since he is such a "catch".  <insert groan here>


I have a bit more time most days, so hopefully I will have a few new projects or baked goods to post about in the near future.

Monday, May 27, 2013

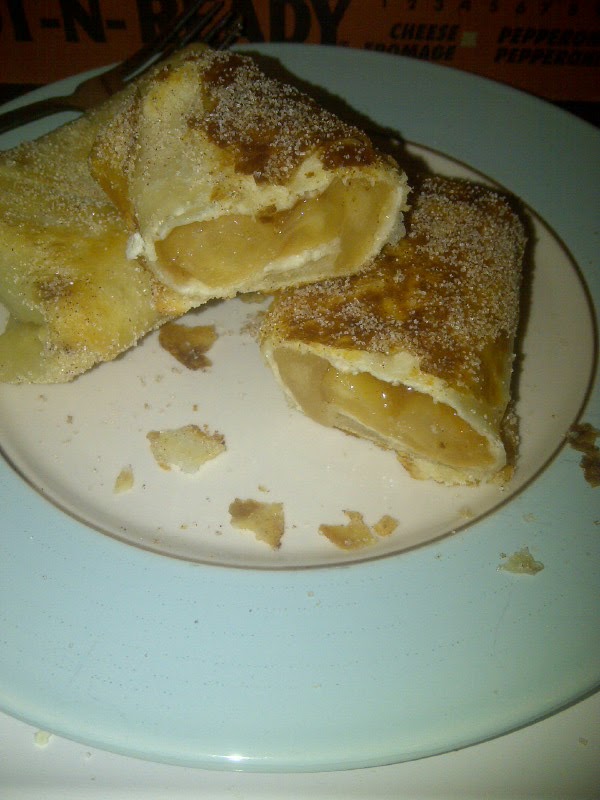
Apple Chimichangas


Who doesn't like chimichangas?  Heck, who doesn't like saying "chimichanga"?

I was craving something apple-y for dessert last weekend and I have seen the link for apple chimichangas on Pinterest a billion times (the recipe is from Juanita's Cocina).  So, I figured I would give it a try.

The recipe calls for homemade apple filling, but I didn't have fresh apples, so I used a can of apple filling and chopped the apple pieces down to small bites.

I had a package of small tortillas and granulated sugar and cinnamon.  Also had vegetable oil.  All set...wait, the recipe calls for frying, which I haven't done in years.  This could get interesting.

I filled 8 tortillas and wrapped them burrito style.  I premixed 1/2 cup of sugar and 1 Tbsp of cinnamon and set it aside, all the while letting about 1/2 inch of oil heat up in the pan.

Then came the test - would I or would I not cause a grease fire and burn the house down?  I figured I had a 50/50 shot.

I clearly added the first three chimichangas too early and they took a while to get that lovely golden colour to them.  The next three chimichangas, well, they died a noble death since apparently I left them in too long and burnt the heck out of them.  The last three, I did for about 20-25 seconds a side, and that seemed just about right.

When the chimichangas were done frying, let them sit on a plate with paper towel to remove excess oil (and blotted them down with the paper towel a bit).  Then I rolled them in the sugar mixture and BAM, done.

I served mine drizzled with a little caramel and some whipped cream.  My husband however liked them straight up and lamented that I only made five (more specifically, lamented that I killed the other three of them).


I didn't start a grease fire, so I'm thinking that's a bonus!

Thursday, May 23, 2013

Been a while - but I have been crafting (Spring Wreaths)

It has been quite a while since I have posted anything.  Its not that I haven't been crafting or baking (though definitely not as much as usual), its more that I'm swamped with tying up everything at work before mat leave and also being exhausted at the end of each day.  However, I did a couple spring wreaths recently and thought I would share some pictures.

These are the same style of wreath I usually make - faux flowers, ribbon and grapevine wreaths.  Oh, and the glue gun, can't forget that. 

 
I needed a pop of spring colour and definitely got that - one is bright yellow and white, the other is shades of purple and yellow.  Walmart's selection of flowers included some sprigs with silk butterflies that were quite cute, so I incorporated those into both wreaths.

Anyhow, here are a few pictures of the final products.